Configure OKTA as an Identity Provider in ZITADEL
This guides shows you how to connect OKTA as an identity provider in ZITADEL.
In ZITADEL you can connect an Identity Provider (IdP) like OKTA to your instance and provide it as default to all organizations. Also, you can register the IdP to a specific organization only. If you allow so, your organizations members can do the same in self-service.
OKTA Configuration
Register a new client
- Login to your OKTA Account and go to the applications list: <OKTA-DOMAIN/admin/apps/active>
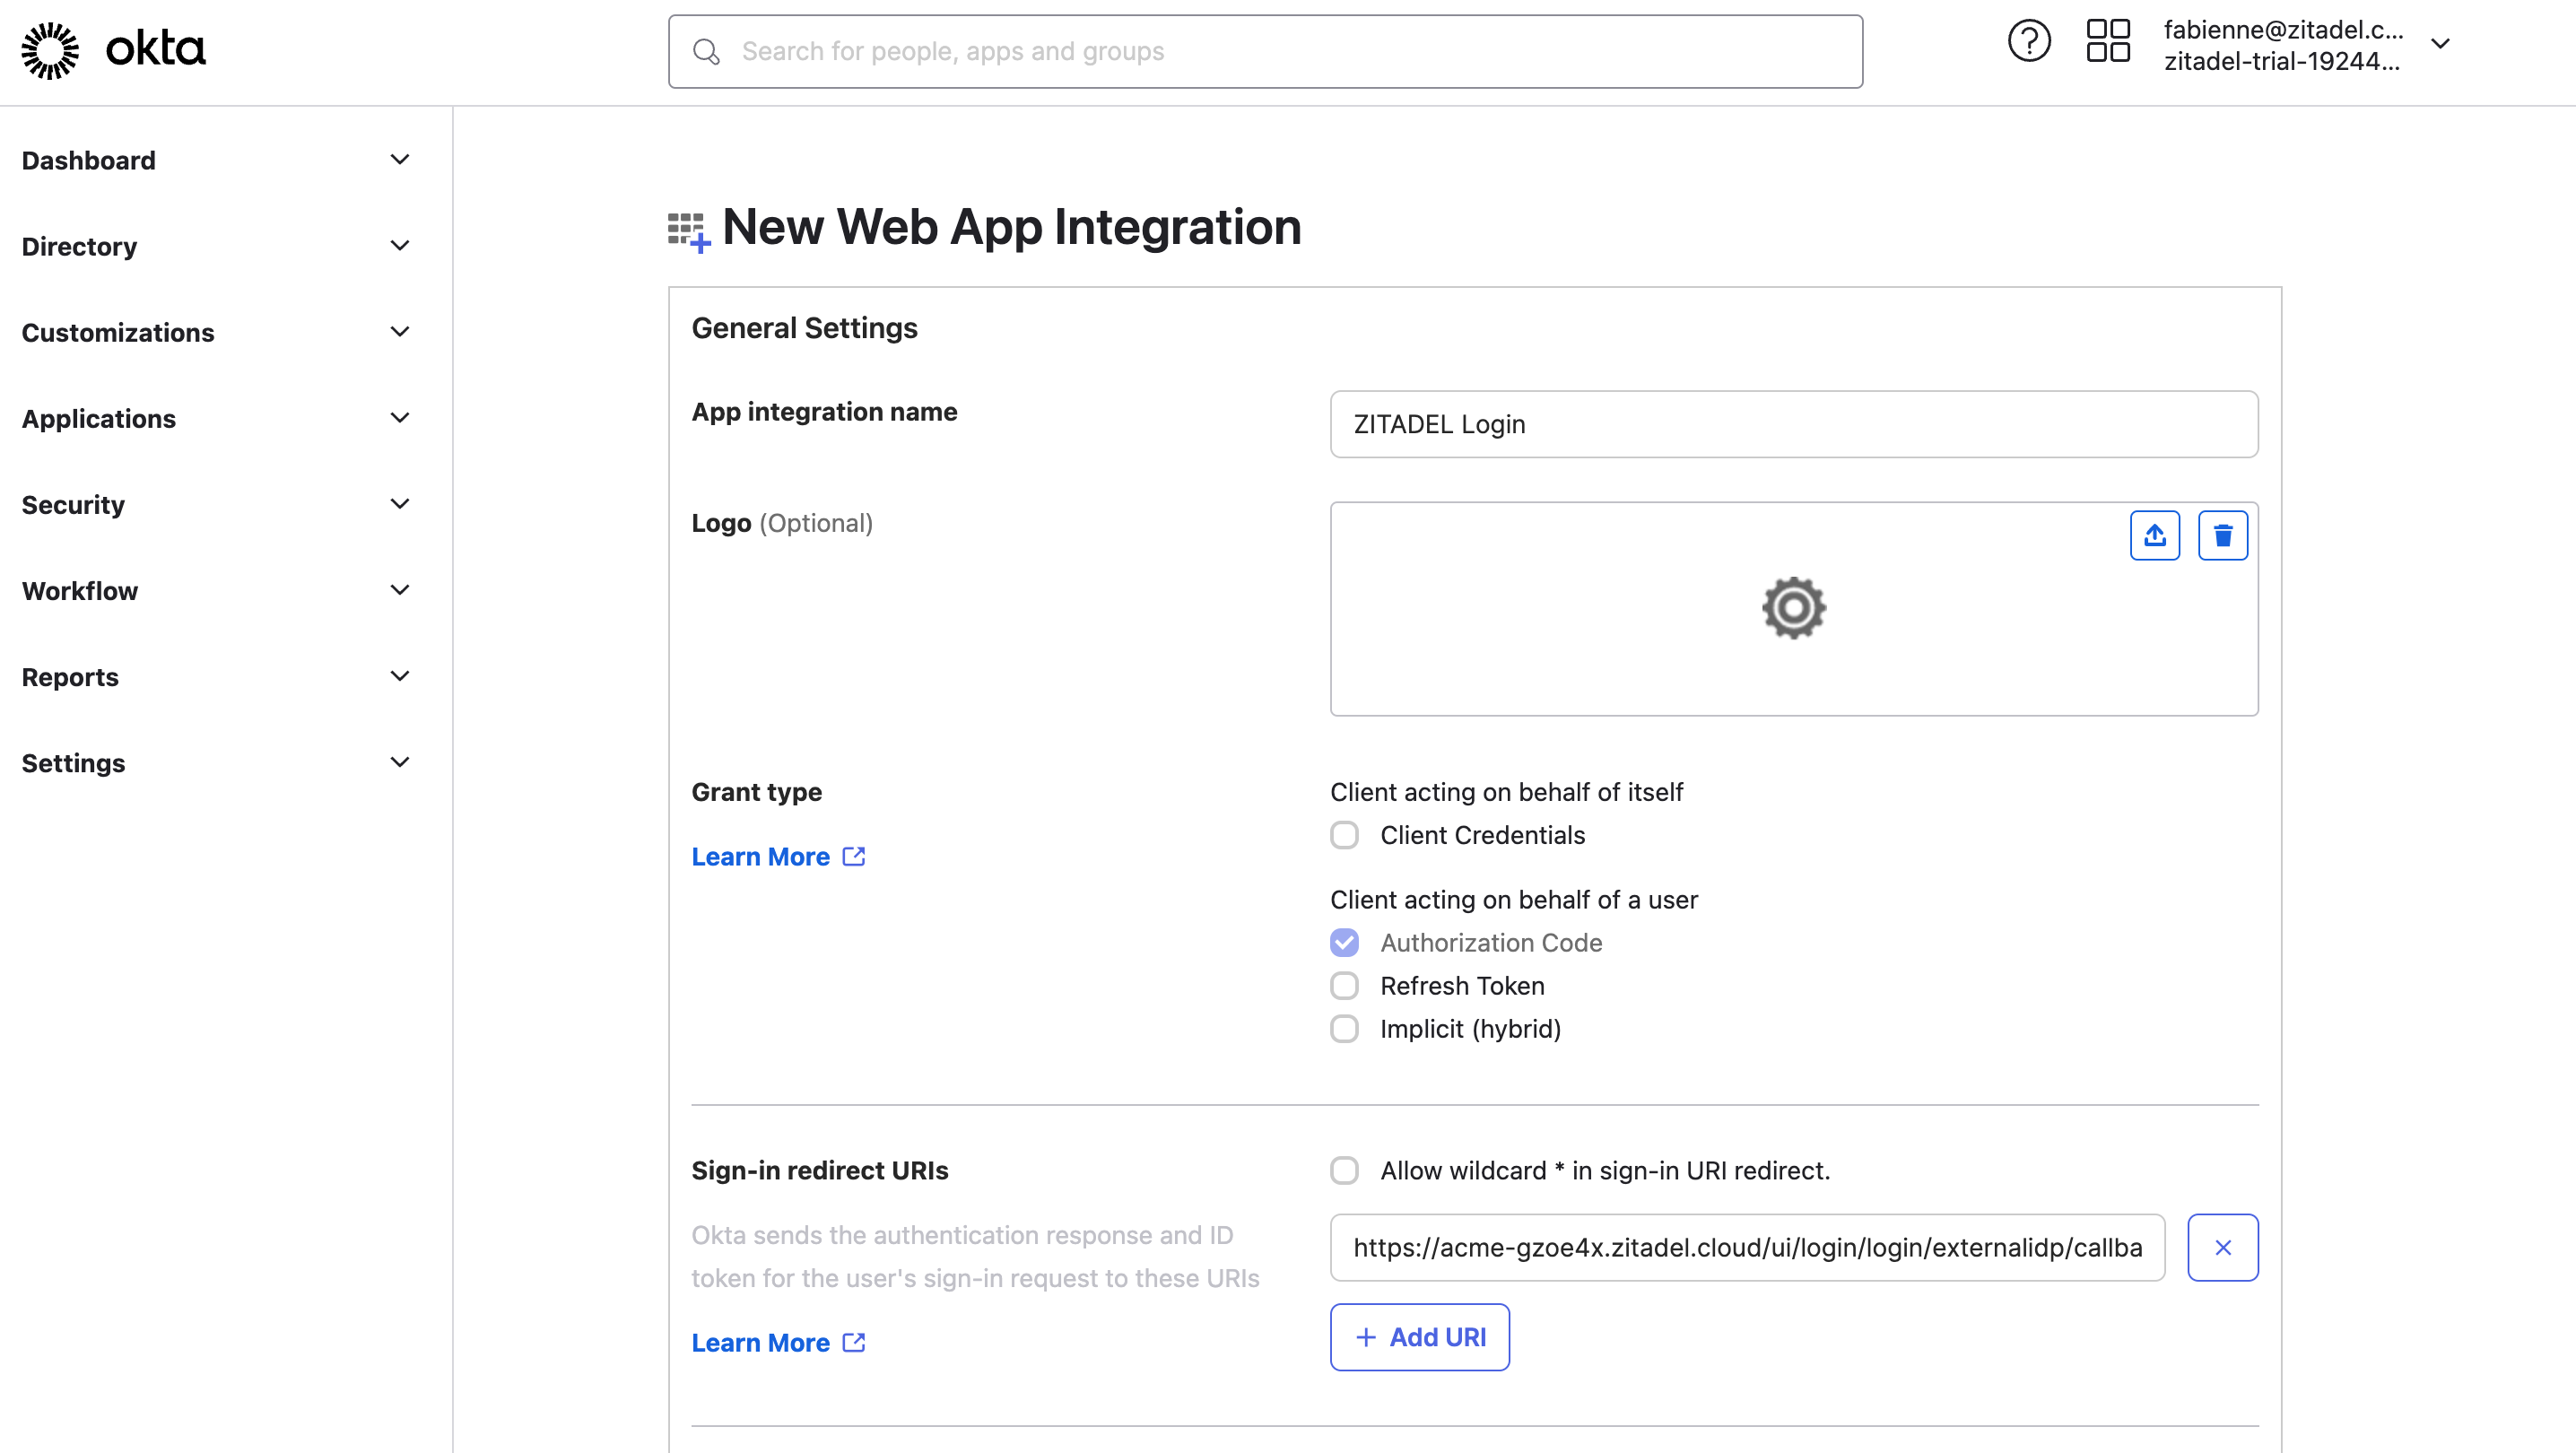
- Click on "Create App Integration" and choose "OIDC - OpenID Connect"
- Choose Web application as Application type and give a name
- Add the Sign-in redirect uris
- {your-domain}/ui/login/login/externalidp/callback
- Example redirect url for the domain
https://acme-gzoe4x.zitadel.cloudwould look like this:https://acme-gzoe4x.zitadel.cloud/ui/login/login/externalidp/callback
- Save clientid and client secret
ZITADEL Configuration
Add custom login policy
The login policy can be configured on two levels. Once as default on the instance and this can be overwritten for each organization. The only difference is where you configure it. Go either to the settings page of a specific organization or to the settings page of your instance. Instance: $YOUR-DOMAIN/ui/console/settings?id=general Organization: Choose the organization in the menu and go to $YOUR-DOMAIN/ui/console/org-settings?id=login
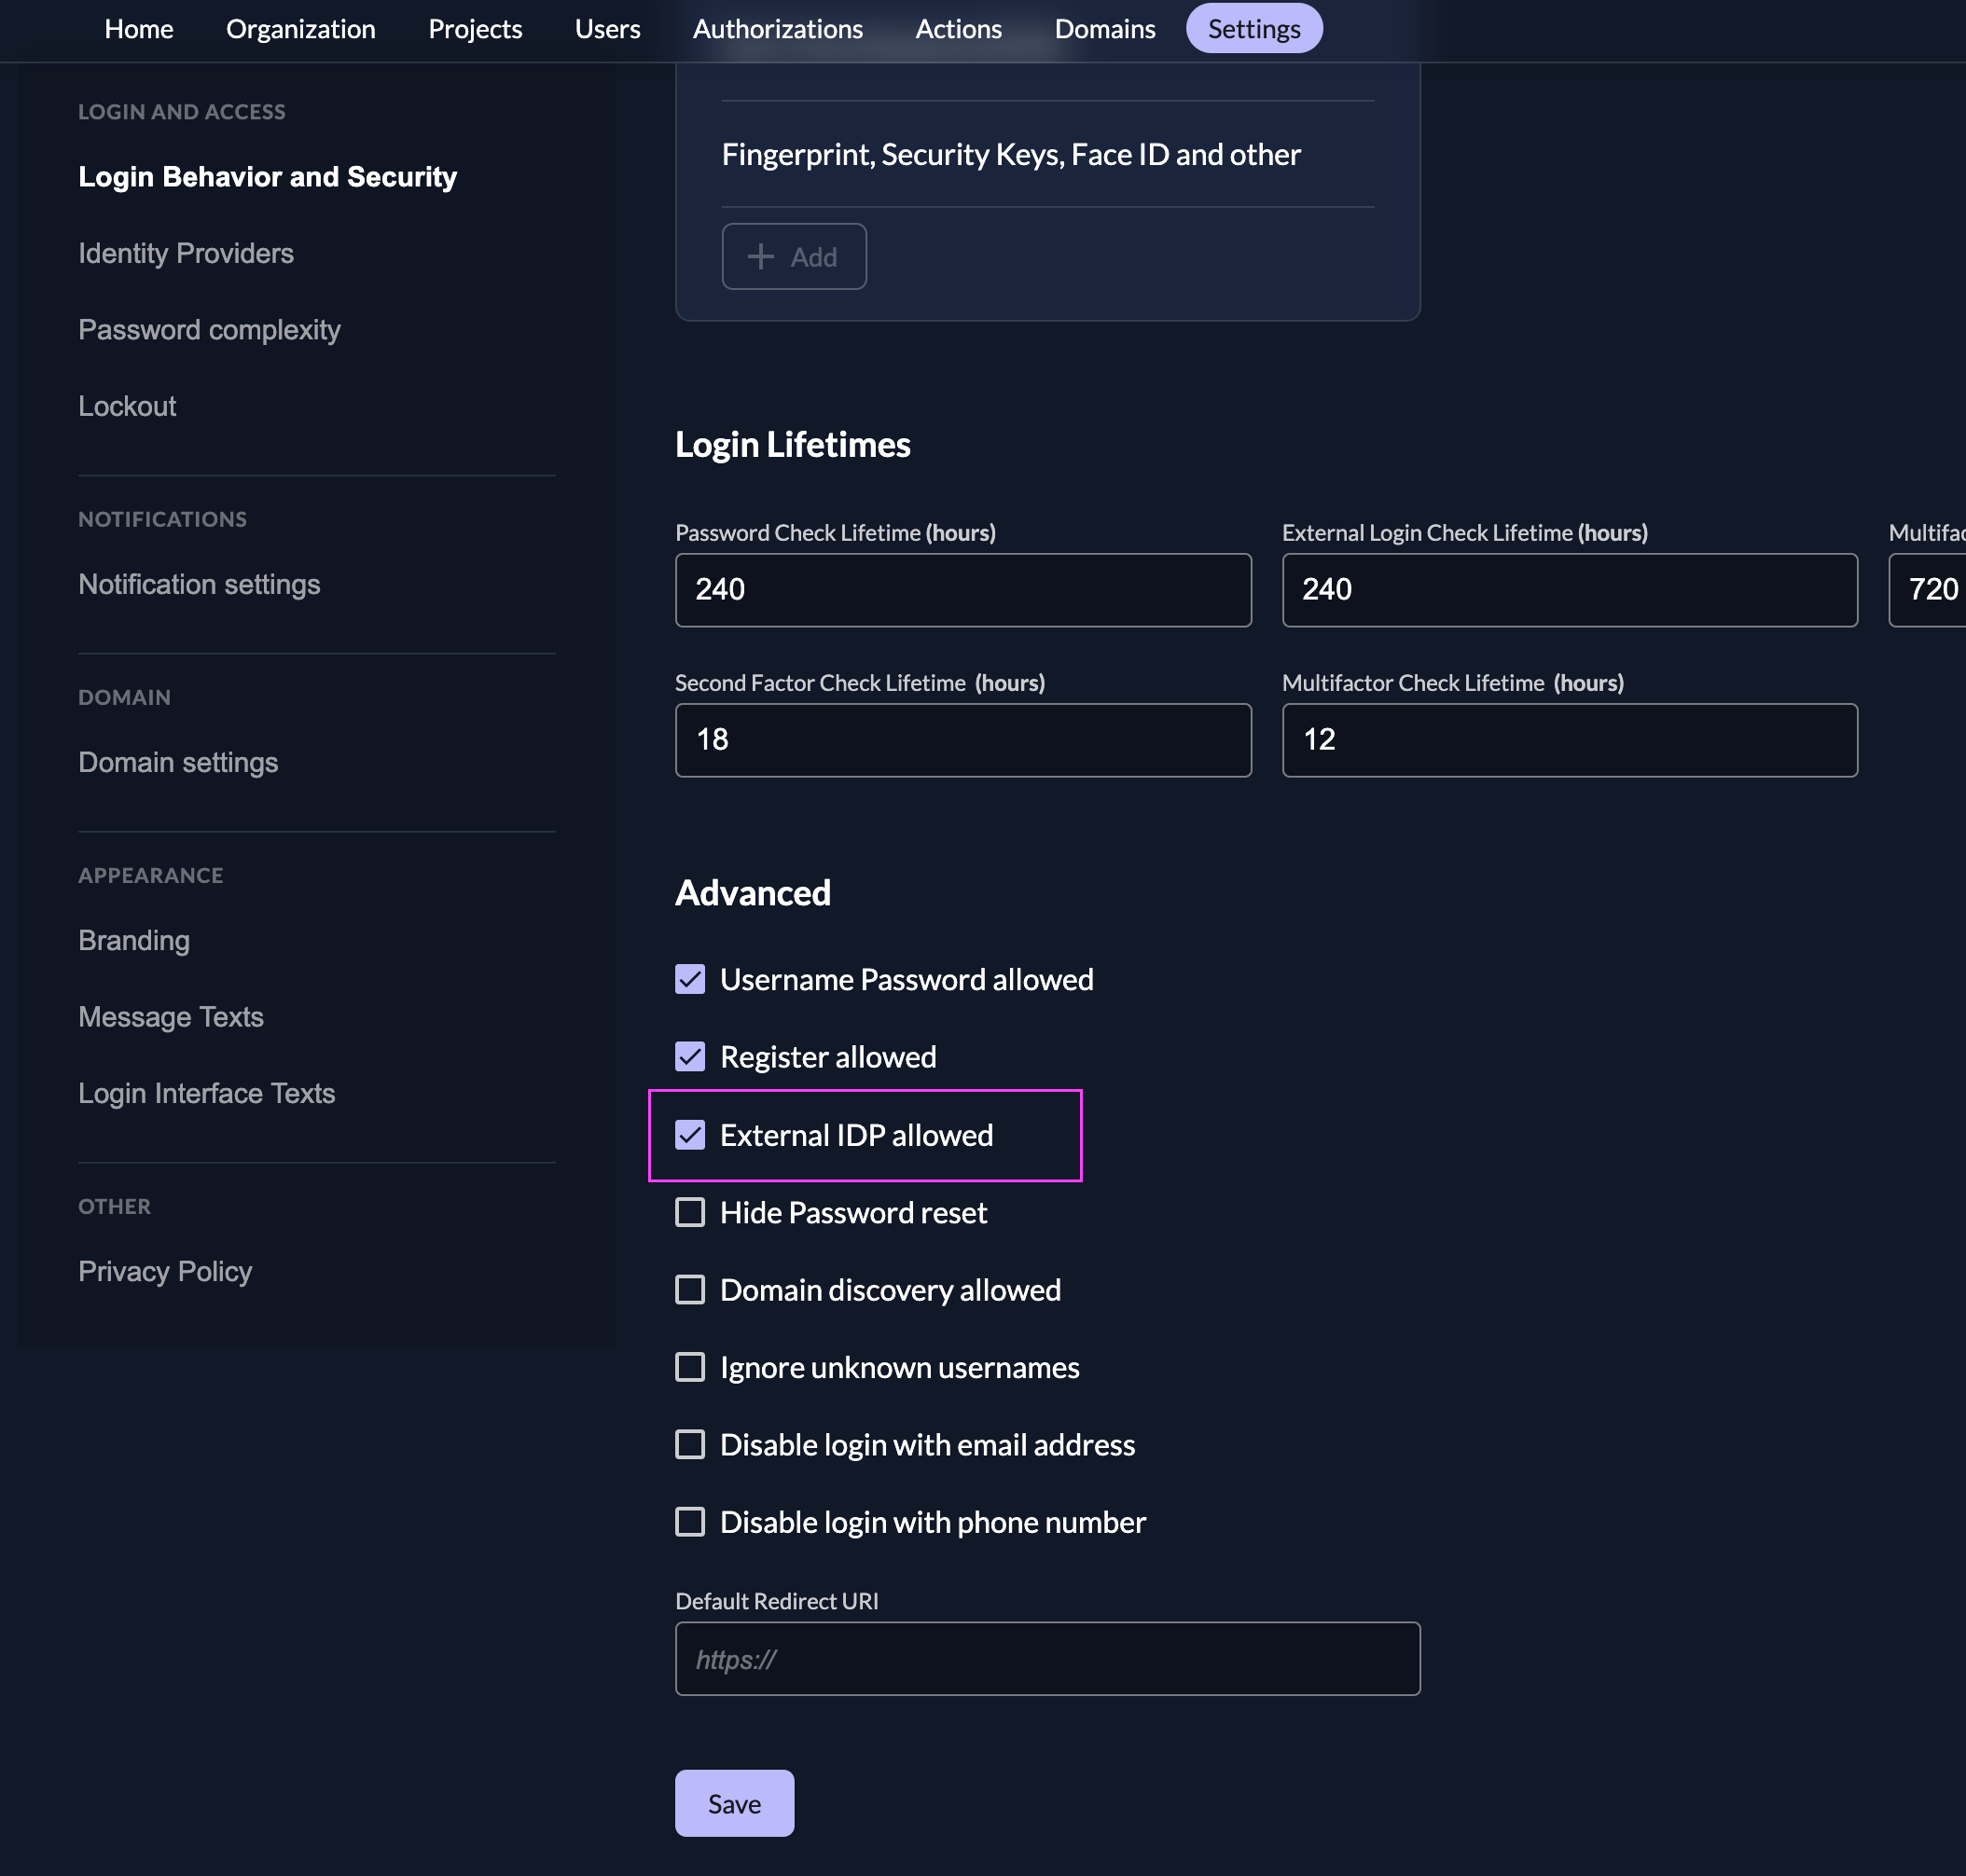
- Go to the Settings
- Modify your login policy in the menu "Login Behavior and Security"
- Enable the attribute "External IDP allowed"
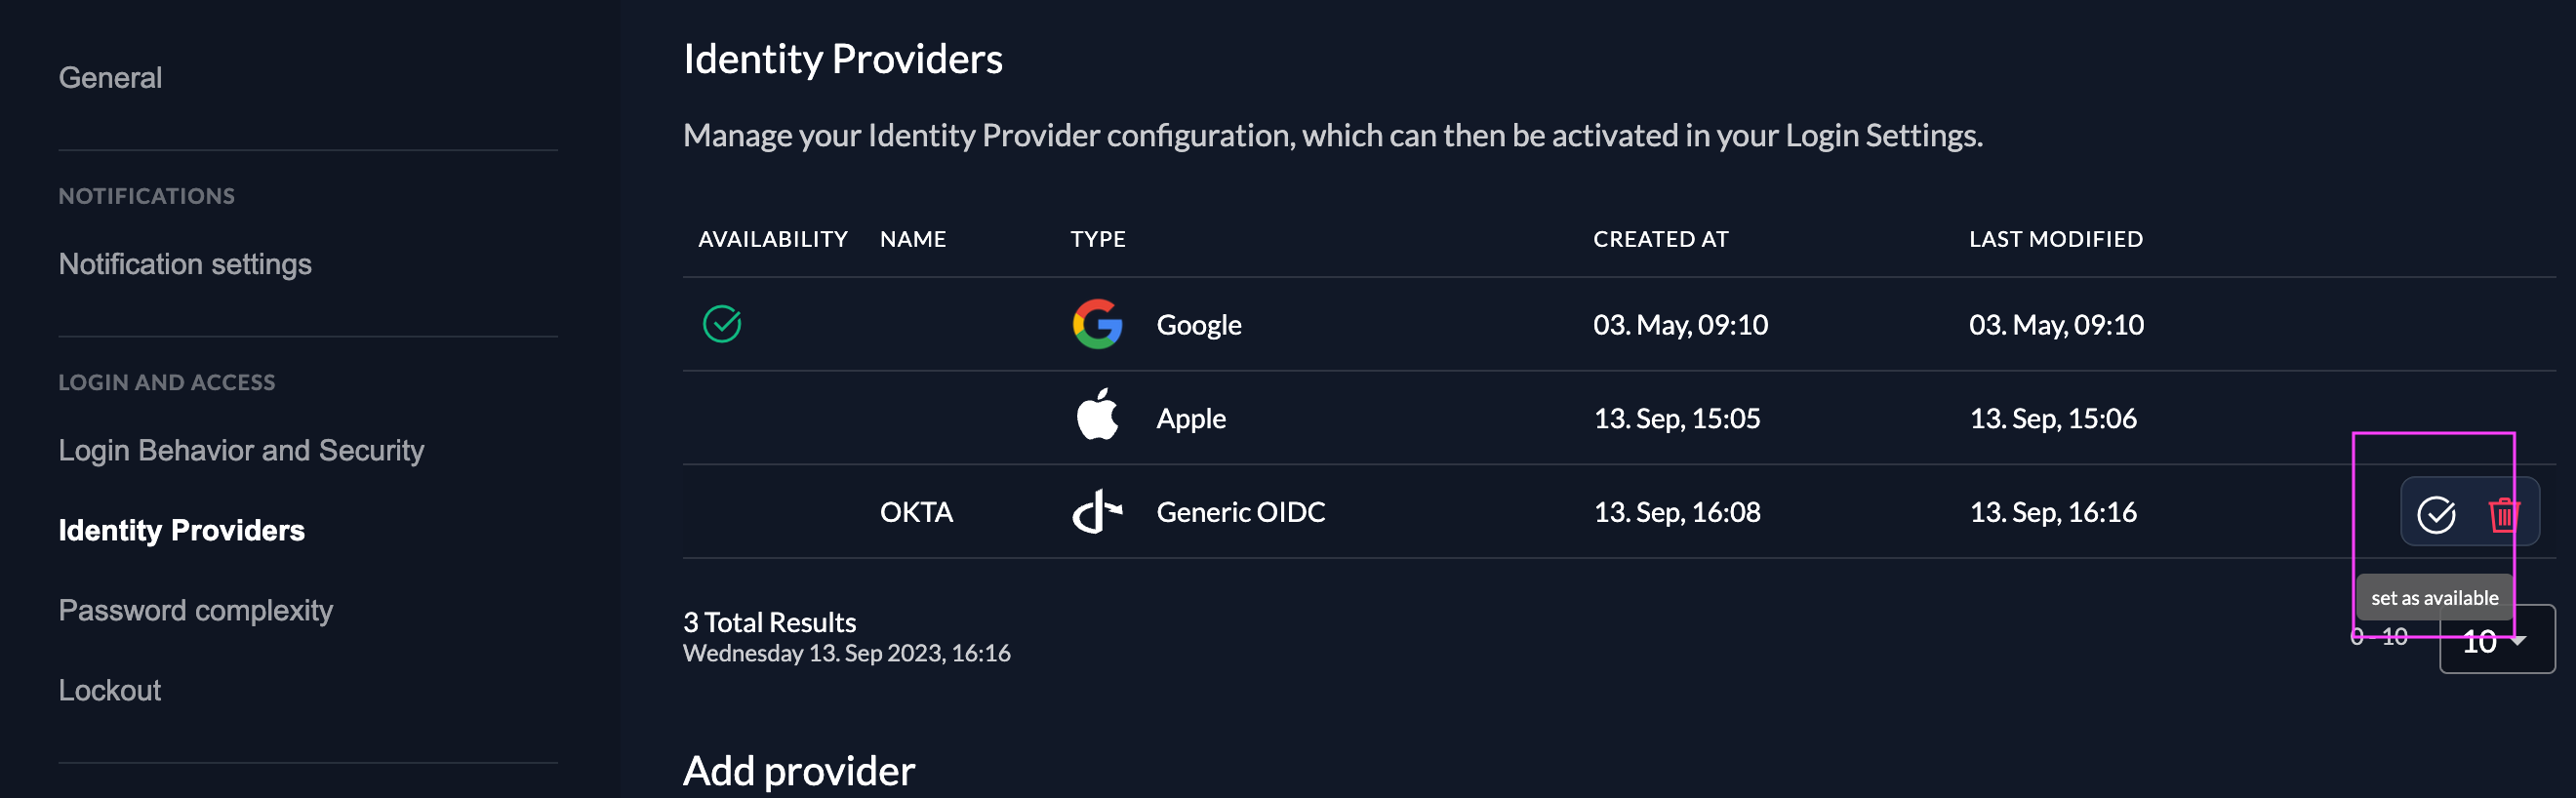
Go to the IdP Providers Overview
Go to the settings page of your instance or organization and choose "Identity Providers".
In the table you can see all the providers you have configured. Also, you see all provider templates that are available.
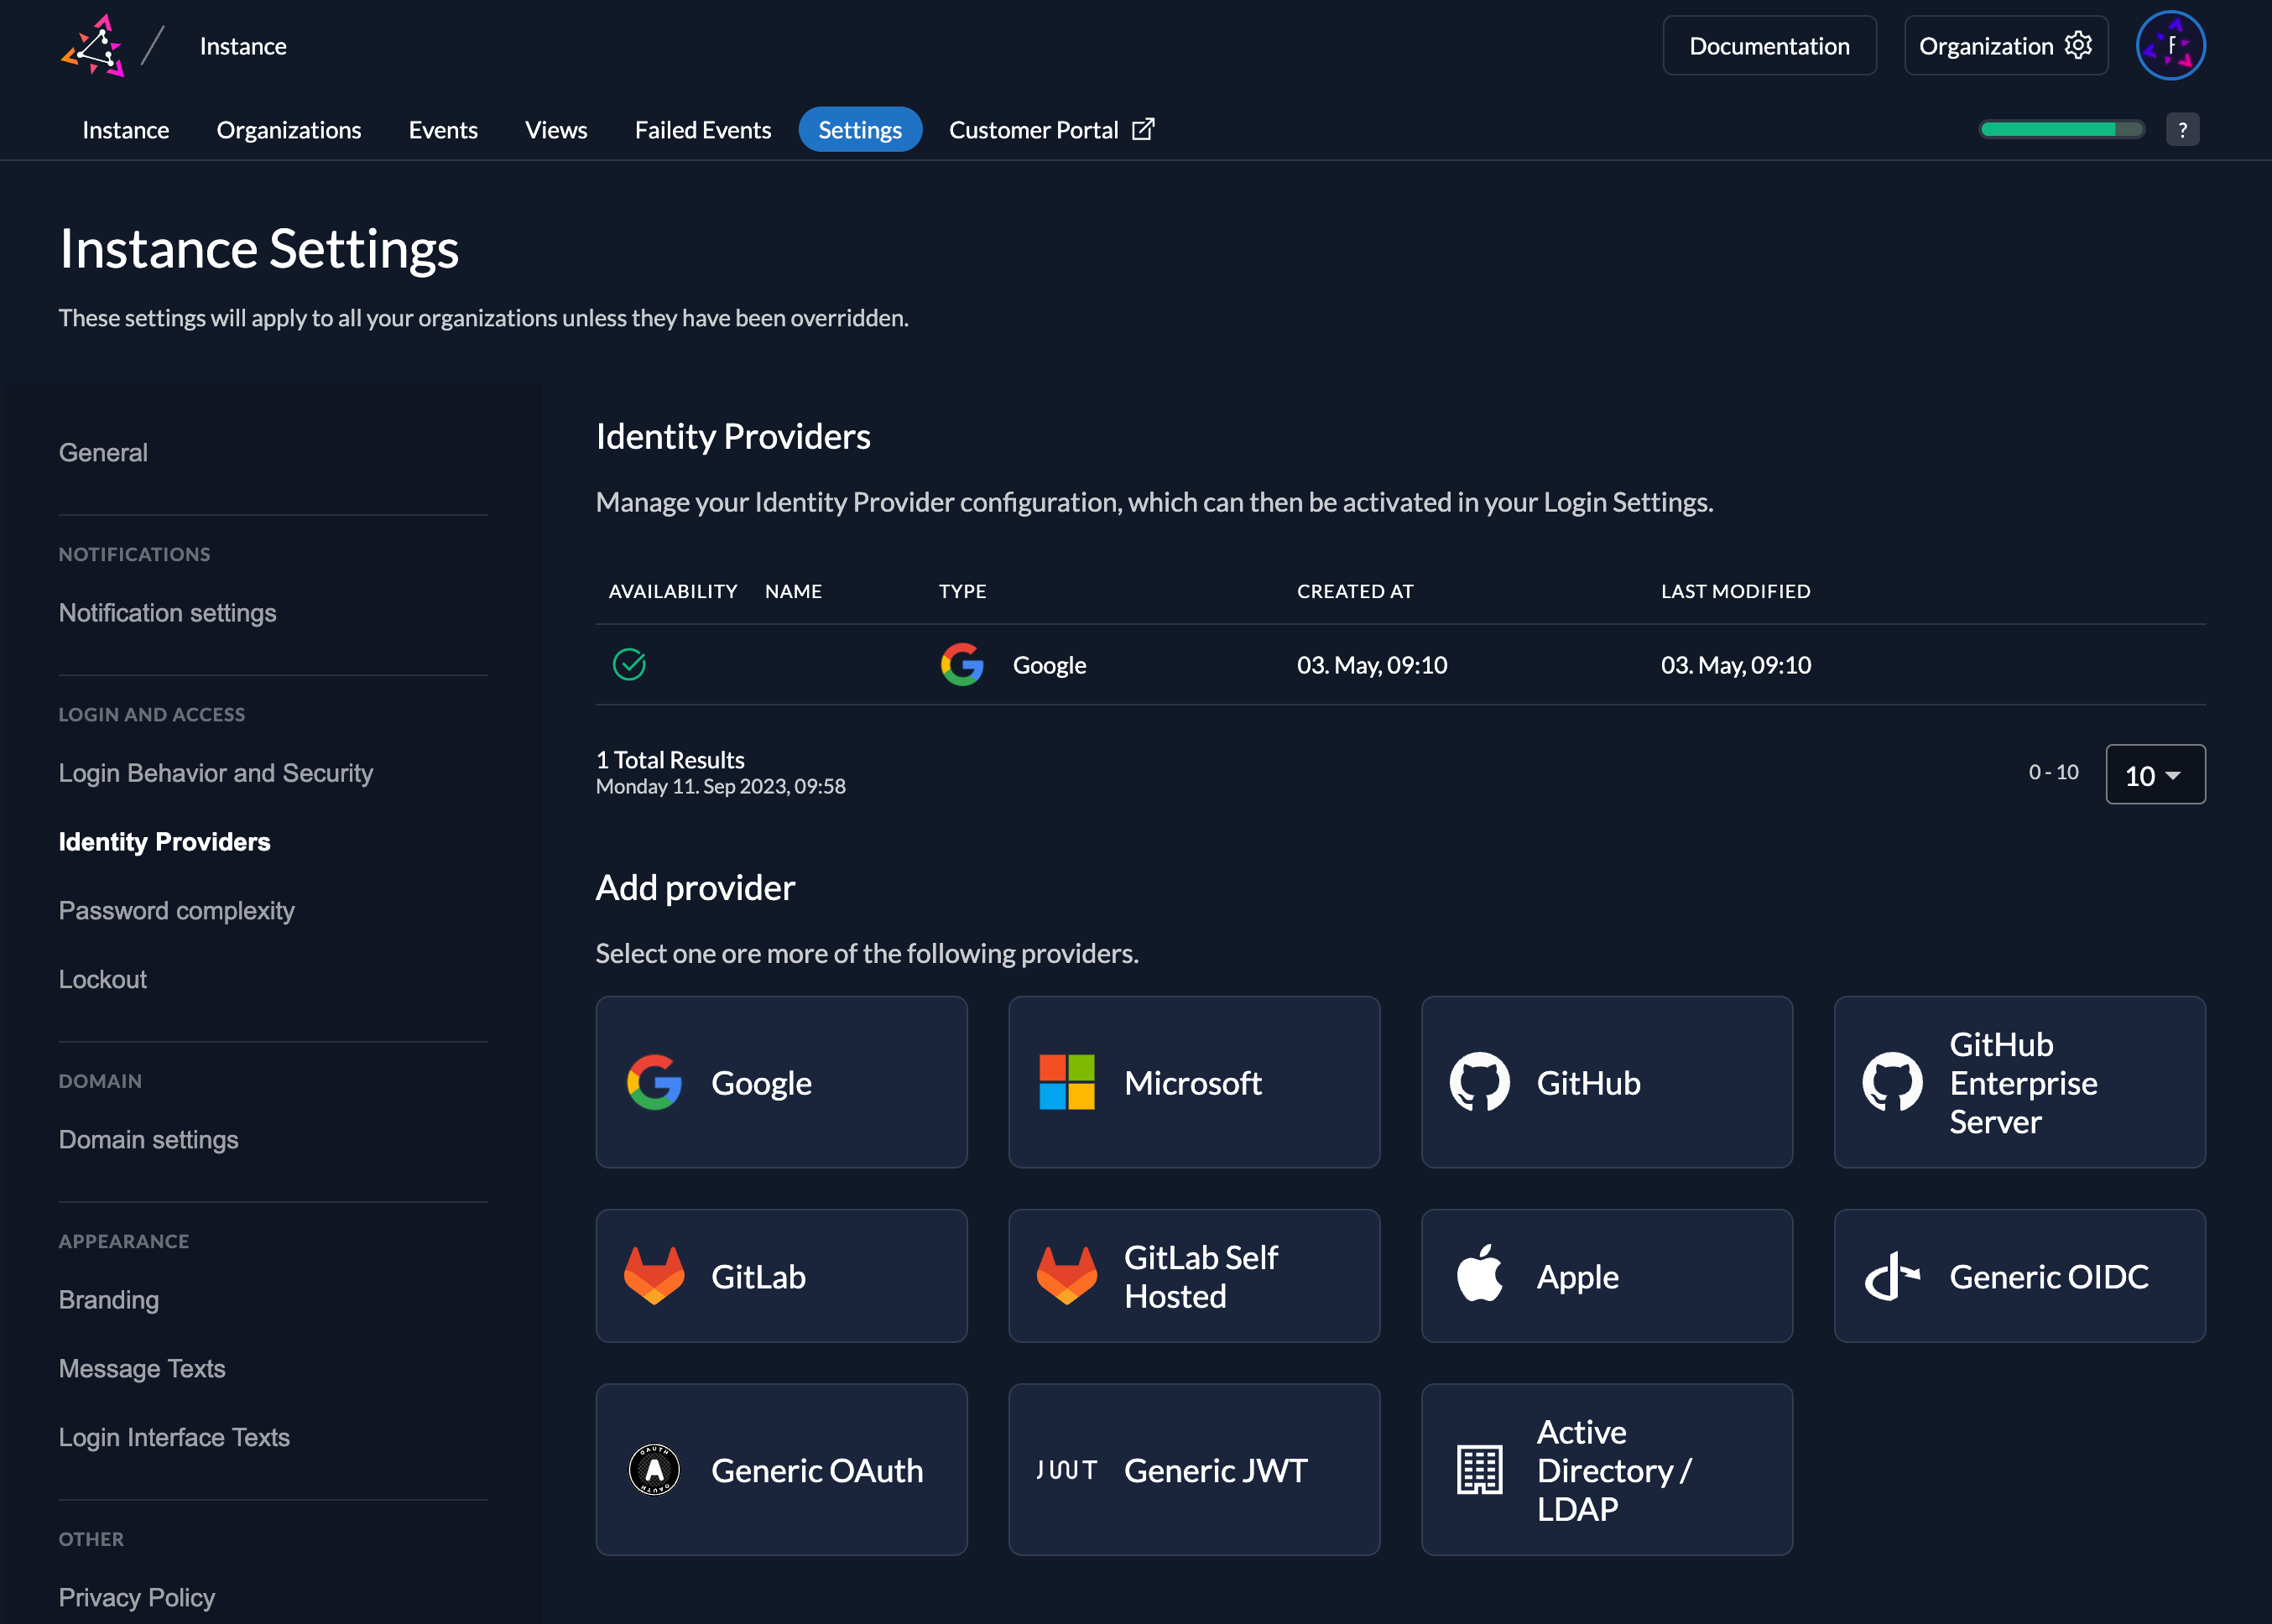
Select the Generic OIDC Provider template.
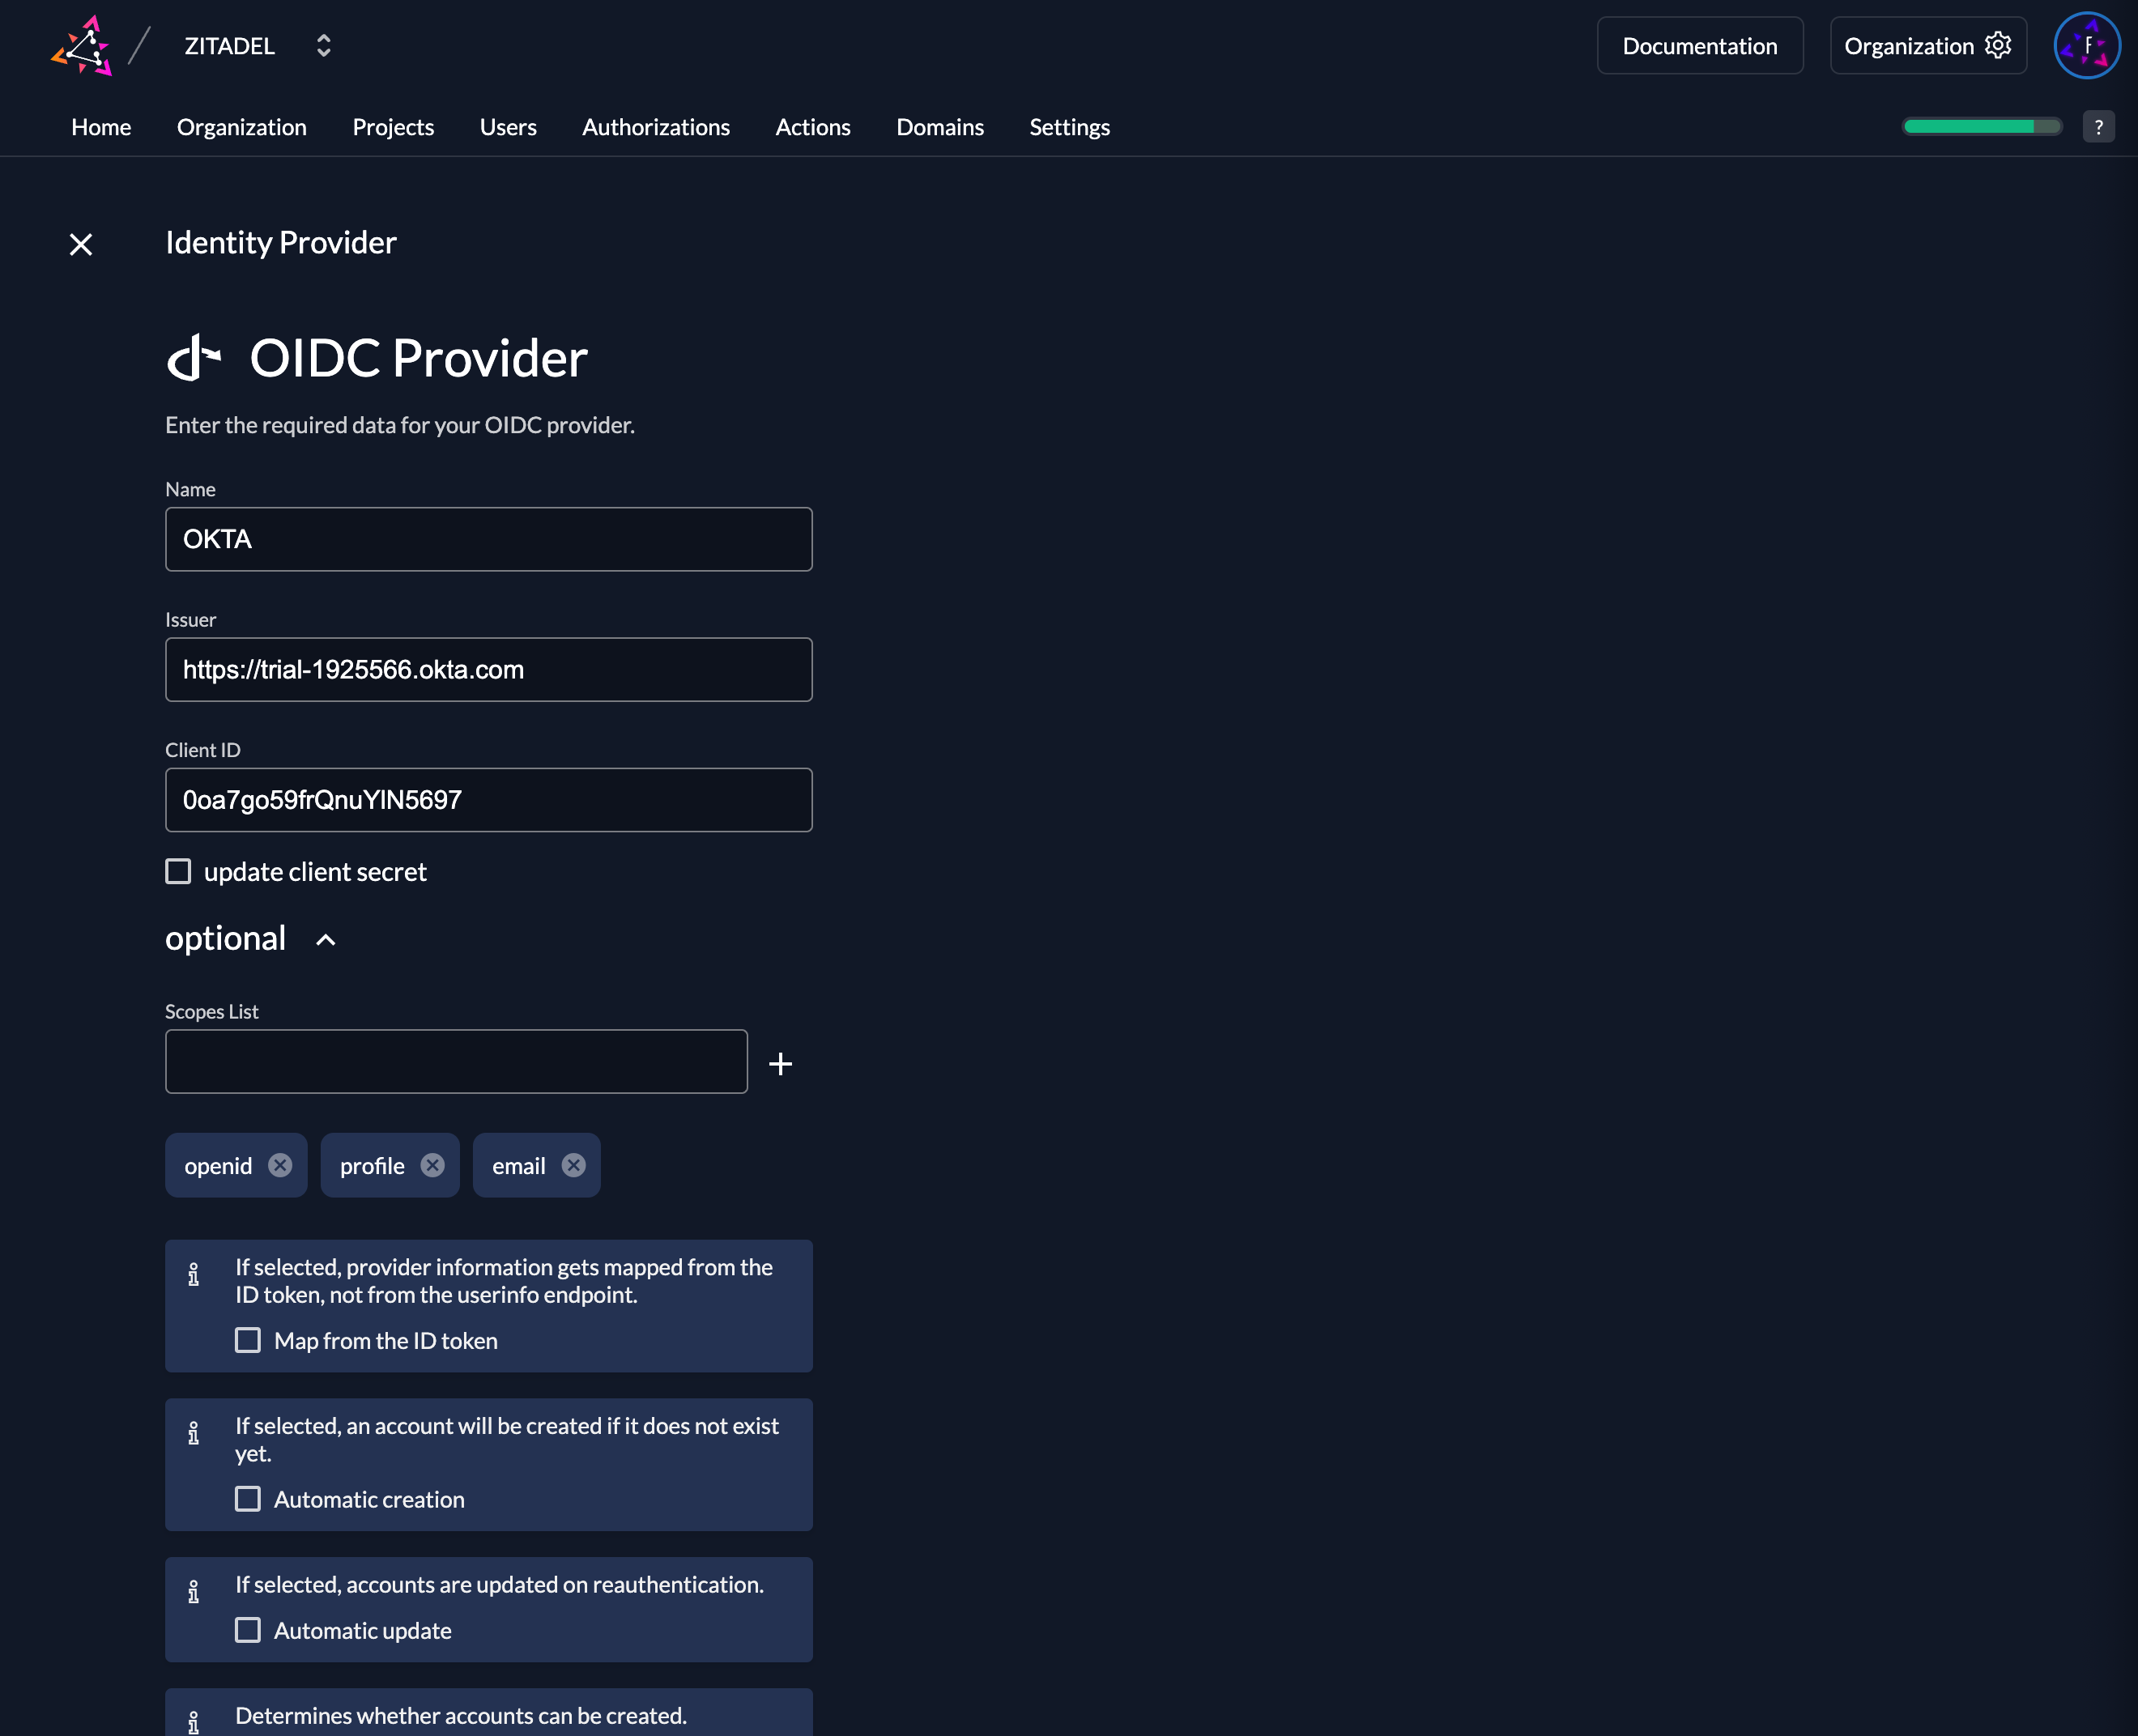
Create a new Generic OIDC Provider
The Generic OIDC Provider allows you to configure any OIDC compliant identity providers.
The following information you need to fill out by yourself:
Automatic creation: If this setting is enabled the user will be created automatically within ZITADEL, if it doesn't exist.
Automatic update: If this setting is enabled, the user will be updated within ZITADEL, if some user data is changed withing the provider. E.g if the lastname changes on the OKTA account, the information will be changed on the ZITADEL account on the next login.
Account creation allowed: This setting determines if account creation within ZITADEL is allowed or not.
Account linking allowed: This setting determines if account linking is allowed. When logging in with a OKTA account, a linkable ZITADEL account has to exist already.
Either account creation or account linking have to be enabled. Otherwise, the provider can't be used.
Activate IdP
Once you created the provider, it is listed in the providers overview. Activate it by selecting the tick with the tooltip set as available.
If you deactivate a provider, your users with links to it will not be able to authenticate anymore. You can reactivate it and the logins will work again.
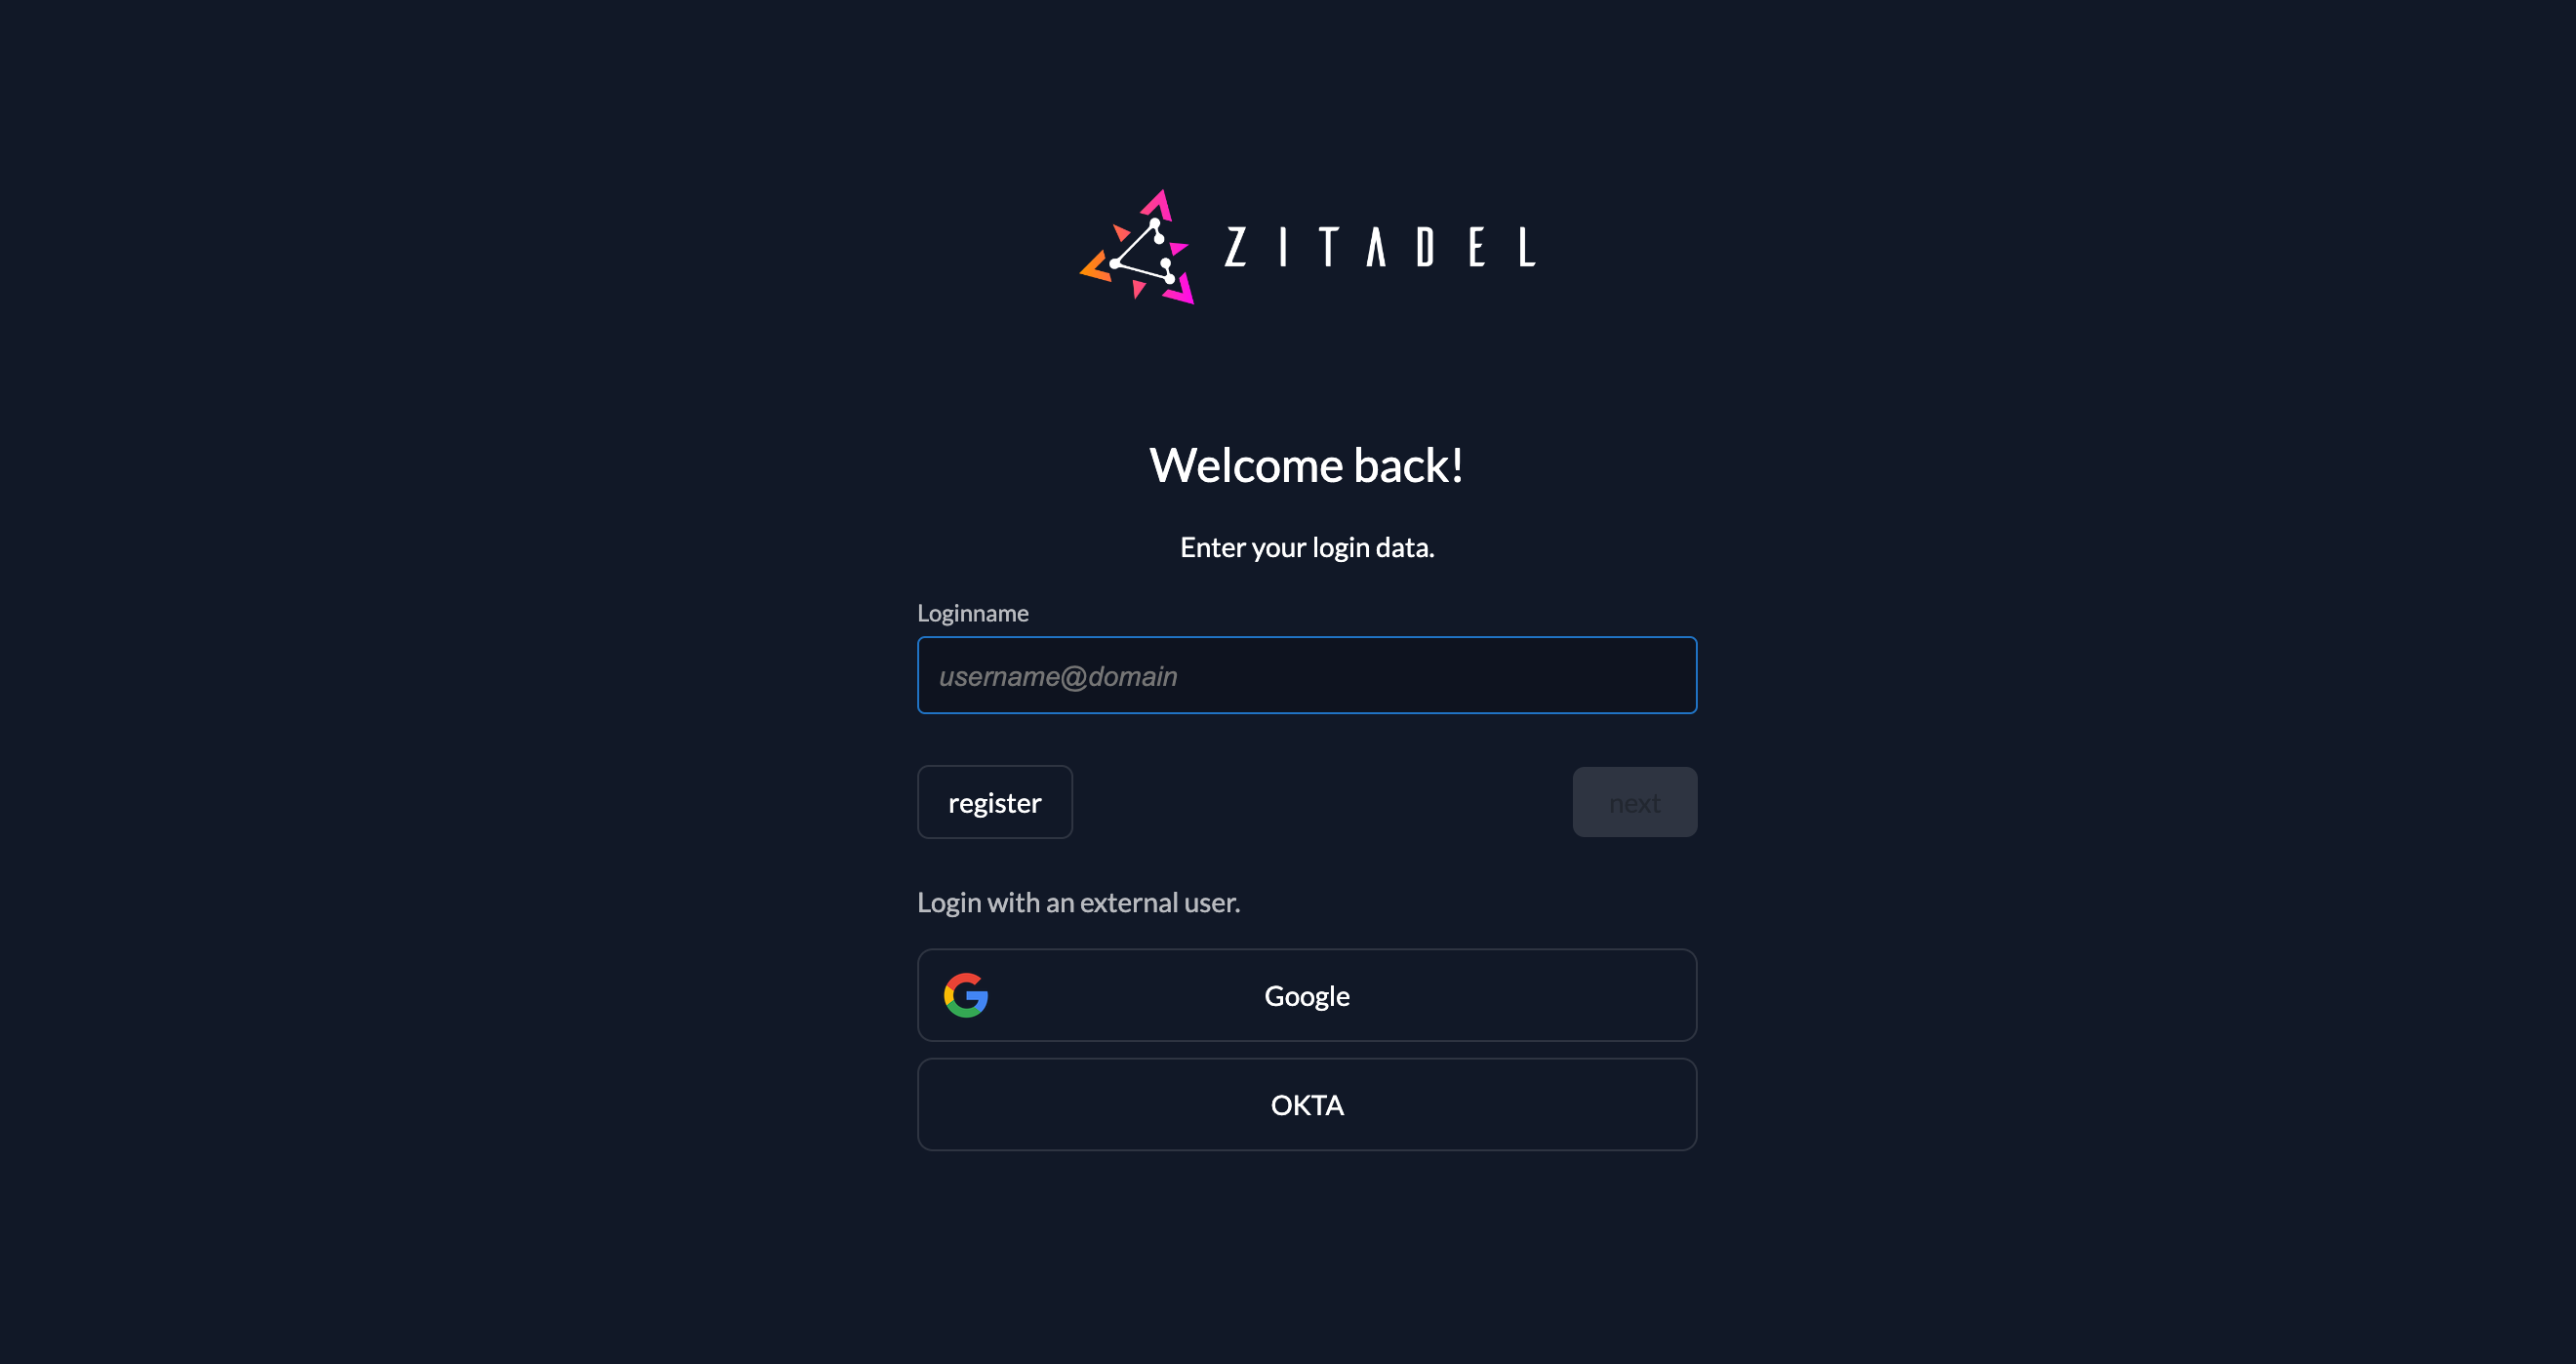
Test the setup
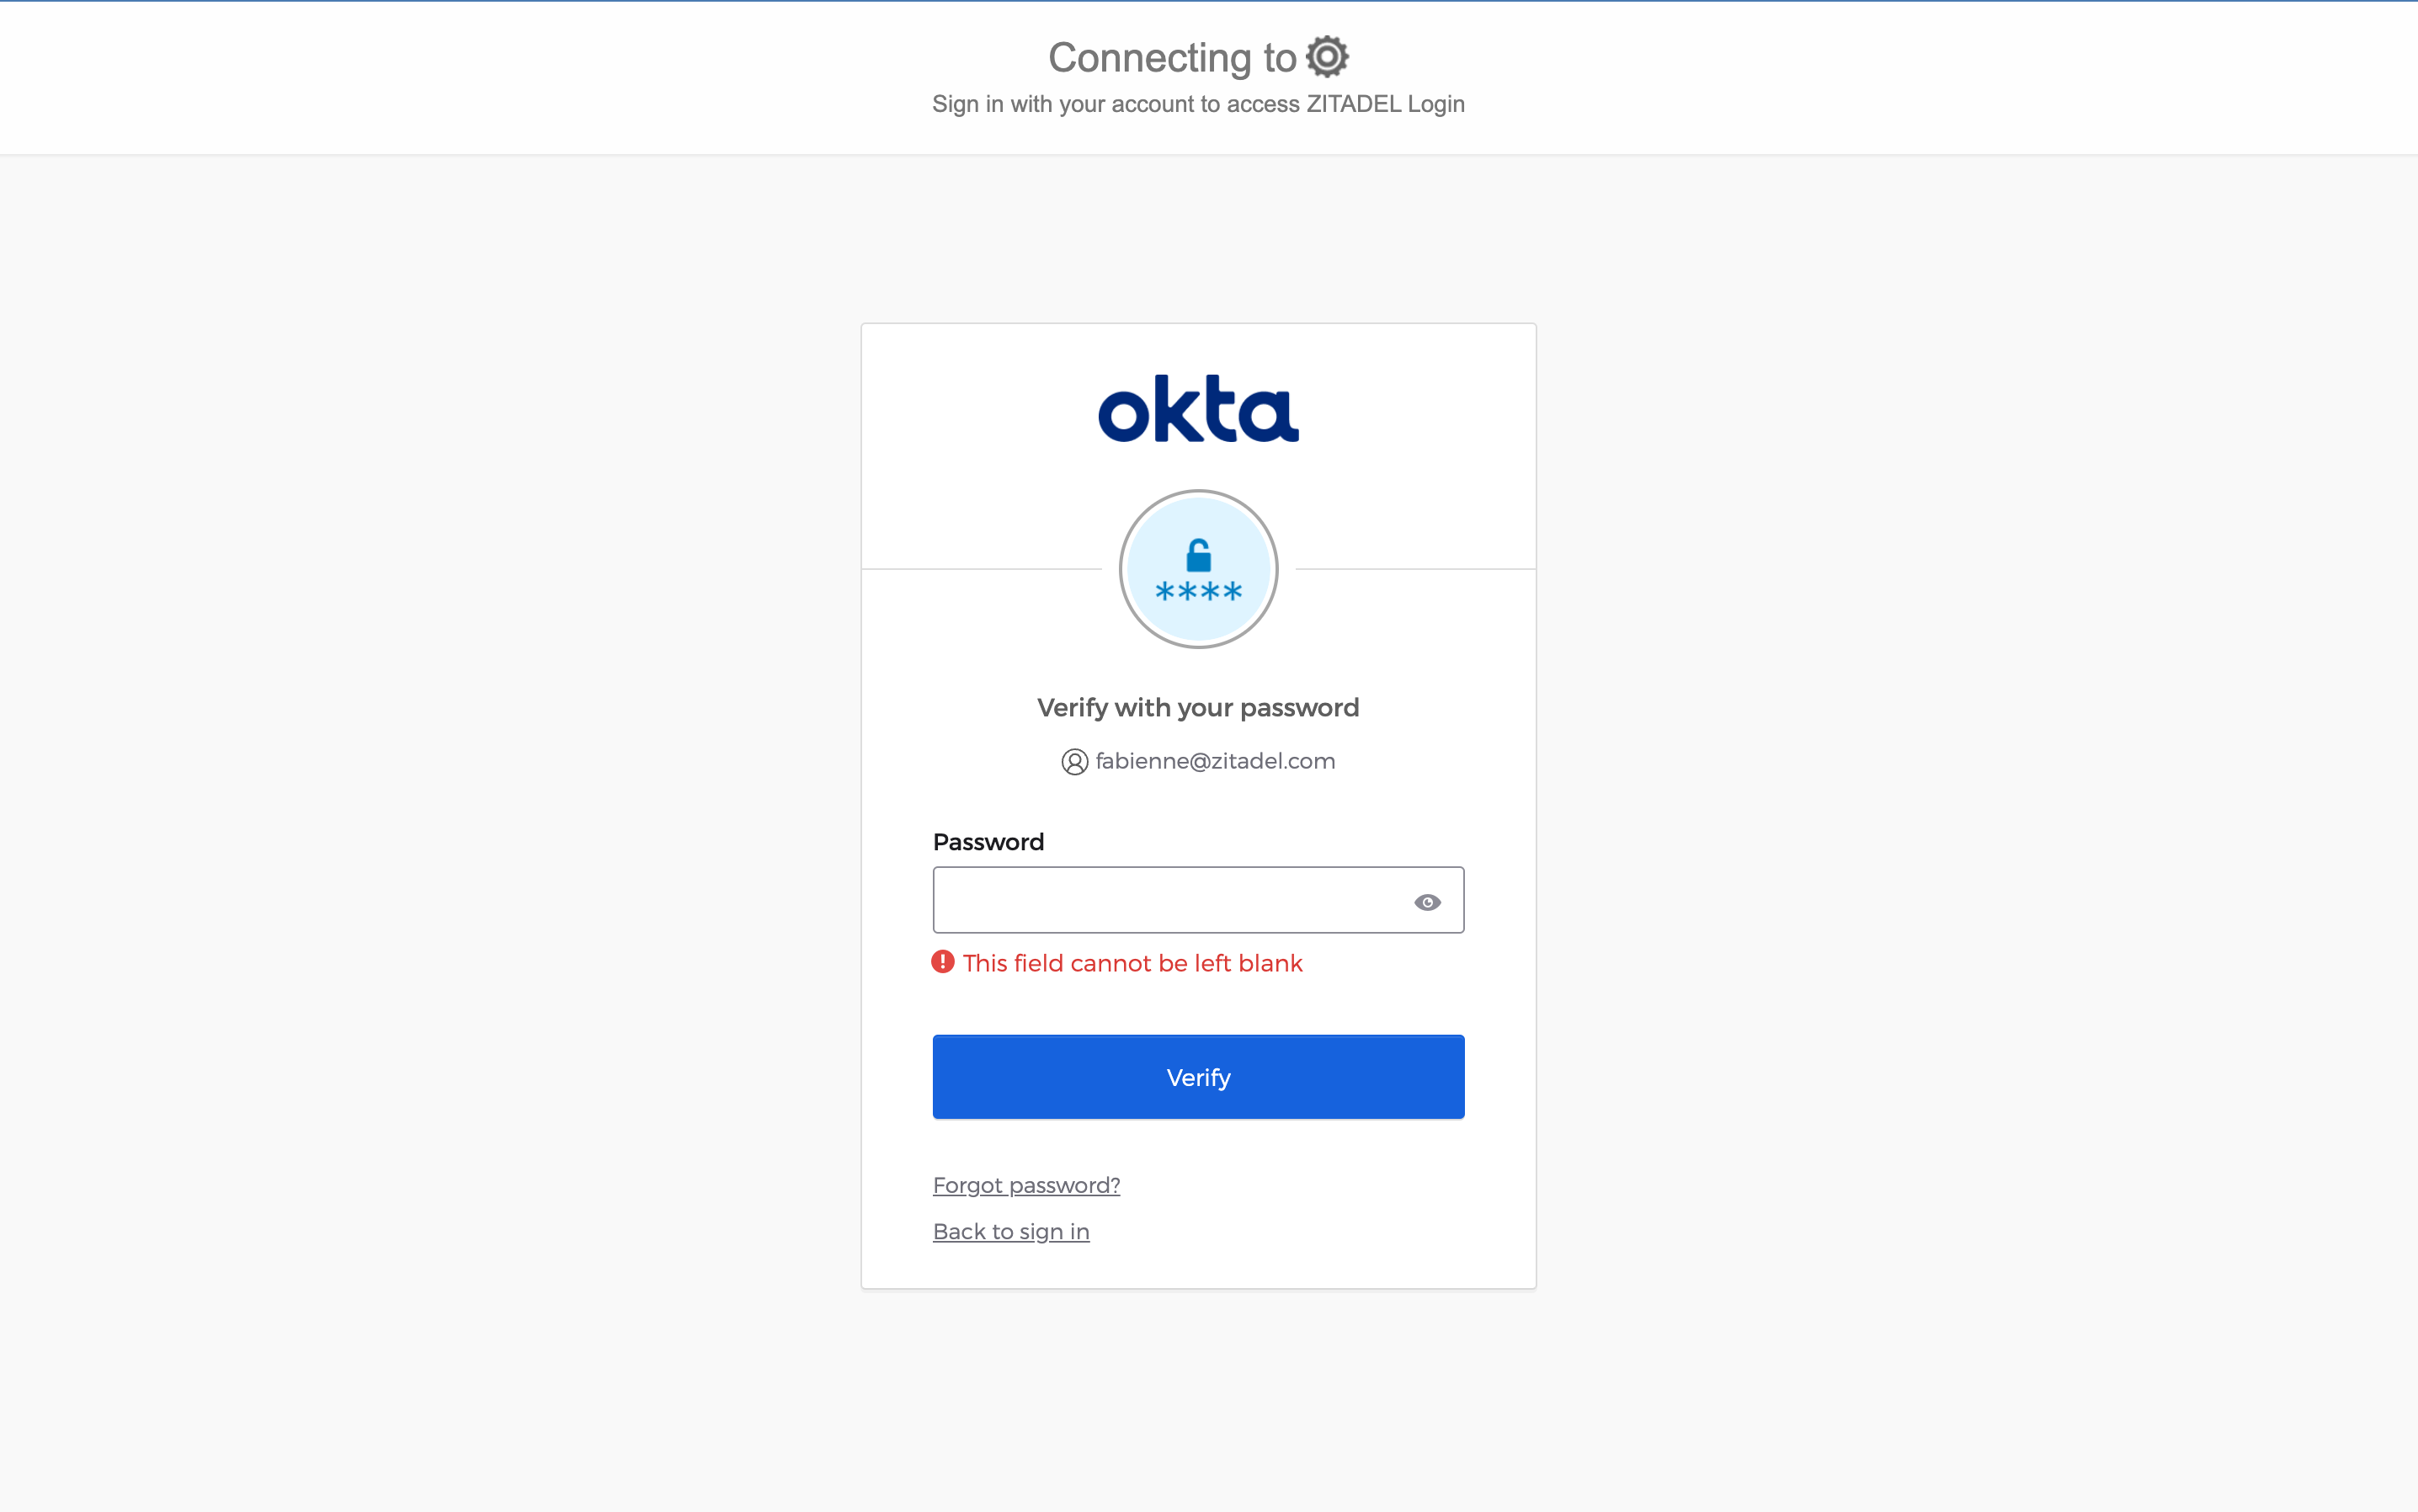
To test the setup, use incognito mode and browse to your login page. You see a new button which redirects you to your OKTA login screen.
By default, ZITADEL shows what you define in the instance settings. If you overwrite the instance settings for an organization, you need to send the organization scope in your auth request.
The organization scope looks like this: urn:zitadel:iam:org:id:{id}.
You can read more about the reserved scopes
or use the ZITADEL OIDC Playground to see what happens with the login when you send different scopes.
Optional: Add ZITADEL action to autofill userdata
loading...